


SHOP TALK: Just Trying To Be Cool
- Jan 22, 2021
- 9 min read

This is how this whole project began. I had everything laid out and was ready to enter my happy place called wiring.
I’m pretty certain that everyone has that one project on their To Do List they’ve been wanting to start, but for some reason have had a failure to launch it. Allow me to share with you one of those projects I have delayed, and the many valid reasons why. That is until recently………… High temperatures have a way of hurting expensive parts here on Planet Gearhead. I have gone through both extensive research and expensive purchases all in the pursuit of being cool. As a matter of fact, I spared no expense when it came to my cooling system. A big double pass radiator, custom shroud with both a push and pull fan, a heavily modified front grill, high volume electric water pump, and the best heat absorbing additives available. My big block beast used to approach 230 degrees after just one pass, yet alone the trip back down the return road. Thank God that is a thing of the past.
Keeping the air and fuel cool in a naturally aspirated engine is just one more component to making more horsepower. My Spectre custom dual plenum and DEI CryO2 cold air and fuel chillers drop ambient temperature down as much as 50 degrees. Cerakoting my headers and complete exhaust system also help keep the under the hood temperature as low as possible. So I took care of the cooling system, the air and fuel system, an oil cooler, under the hood temps, and I even put a fan in the cockpit to keep me cool in the staging lanes. What could possibly be that one project I’ve been putting off? If you guessed the transmission, you were correct. Now before we go any further let me cover myself and tell you that I did indeed install a trans cooler and some long braided -6 lines when I first built the car. At that time however, my budget was dwindling and all I could afford was a basic, small finned cooler to help keep my Rossler built Turbo 400 from melting. This basic set-up kept me cool enough to cool down between passes. It did not work efficiently during a mandatory 30 mile cruise in the “True Street” class prior to making 3 passes. Something as simple as freaking people out at a local cruise night became borderline stupid on my end. I needed to address this problem, and here are the reasons why I put it off until now. The first reason is that my car was done and it worked! When you take years building a car from the ground up, money is budgeted and assigned to things like horsepower and safety. When the budget runs out, you get whatever you can afford. When you finally get it running, you tend to want to keep it running and enjoy it. Ripping it apart is really not a priority. So reason #1 covers no budget, and eagerness to enjoy the car. Reason #2 falls into finding the time to take apart something that works, over fixing something that is broken. Which brings us to reason #3. As much as I hate to admit it, reason #3 is actually the most valid of all that delayed me from starting this project. Please don’t judge or think any less of me for what I’m about to admit. Instead, you should salute me for being honest and admitting the true level of my over the top, anal case of OCD. So here it goes……… I was afraid, yes terrified of taking apart my absolutely gorgeous car. I knew I had zero room for a bigger cooler yet alone a fan. I knew I had zero room for a deeper, all aluminum finned trans pan. I knew I didn’t have any more room or open circuits on my custom, homemade and meticulous power board and switch panel. The only thing I did have room for was another channel in my data logger to monitor transmission temperatures. So in the back of my mind was not just disassembly, it was cutting, grinding, and welding in a freshly painted, meticulous environment.
Staring at my car every day in my shop during the heat of the Corona outbreak gave me waaaayyyy too much time to think things out. For those of you who are tinkerers like me, you know exactly what I am talking about. I don’t know how to sit back and relax, under any circumstances. Being stuck at home, with no place to take my car, created the perfect storm to release the Kracken, start fabricating and spend money I don’t have! It’s funny, a long time ago I wrote an article entitled “Nothing Is Ever Easy” and time after time it has proven itself to be profoundly true. The only aspect of this upgrade I was remotely worried about was programming the data logger to read a new sensor and inputting all of its values. I also needed to figure out how to send that data to my digital dash for display. Making the cable and wiring the sensor are things in my specialty wheelhouse, but I hadn’t played with programming that brain and dash since I installed it. At the end of the day, this whole process was as smooth as silk and gave me no troubles what-so-ever along the way. As a matter of fact, I was actually happily impressed with myself when I fired up the digital dash and saw the trans temp displayed on it. I held my fingers on the actual sensor and watched the temperature rise in amazement.

I have to admit, I was pleasantly surprised when all of my data entry appeared perfectly on the screen. It was kind of cool being able to give each one of my sensors a personal name on all six screens of my dash.

Randy at RPM Performance gave me all of the necessary data that was needed to program my computer to accept the new sensors. This was the only part I was worried about, but it turned out to be the easiest and least stressful part of this project.
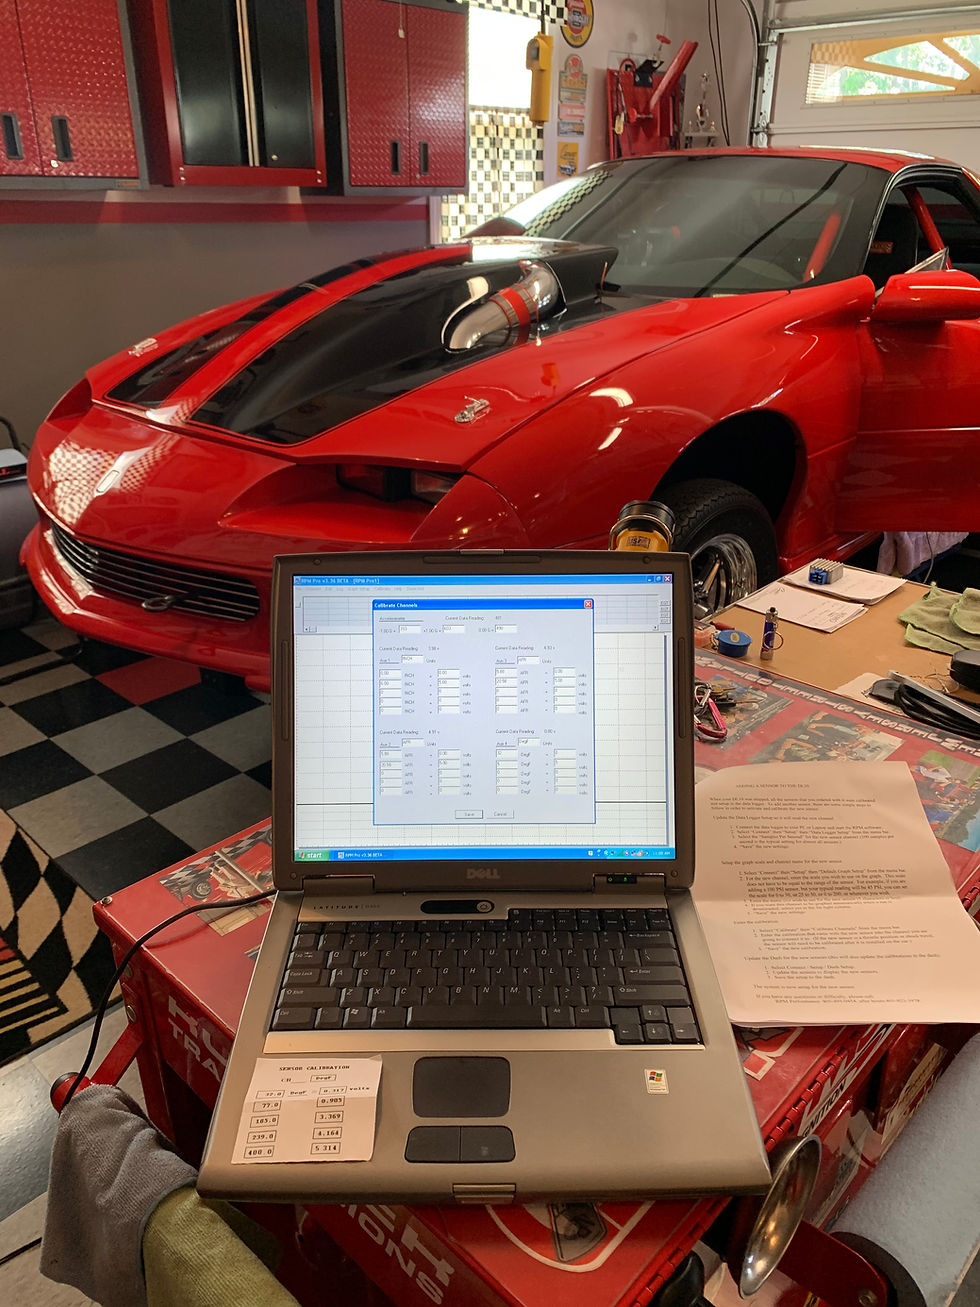
I have to admit that programming the data logger was a lot of fun. I talk to my car on a daily basis, but being connected with an actual cable brought a whole new level of intimacy to our relationship.
I found the deepest aluminum trans pan that was not only finned for cooling, but had the temp sensor bung already in it. This was supposed to be the easiest part of the job. I mean it is as simple as mounting to the block and screwing in the temp sensor right? Well this was far from reality as the placement of the temp sensor bung was perfectly in-line with the side of the filter. There was no way that sensor was fitting in that pan. I worked for hours trying to modify a filter to accommodate the thermocoupler all with no avail. After taking numerous and precise measurements on pan thickness and placement, I decided to drill and tap a new port for the sensor. I was a proud papa as I mounted the pan once again and screwed in the temp sensor. Just when I thought it was smooth sailing, the “Nothing Is Ever Easy” article came back to bite me. I was about to put the last pan bolts in that mount the trans fluid spit tank to the pan, and saw there was no way it was going to fit and align with those holes.

Electronics and wiring are one of my specialties, and making the connections on the temp sensor and connecting cable was a breeze. Little did I know at the time, the troubles that lie ahead.
Now please remember, because I had had a brain fart at that moment and thought that the new pan had holes in a different spot. The fact is that the block is the block and the holes have to be in the same spot. So what was the problem you may ask? The pan is so heavily finned that the extra material prohibits the spit tank from getting close enough to mate with the pan. No need to panic I will find a new home for it. The only problem is there is no other place to call home. I stuffed a 572 cubic inch big block with 3 ½” pipes, not to mention a Turbo 400 into that tiny 4th generation Camaro real estate. I reluctantly removed that new, modified pan once again and went back to design mode. After a lot of staring, measuring, and profanity, the least of the evils was to cut and grind all of those beautiful fins off the one end of that once new pan. Please remember that money is extremely tight and torturing an expensive pan hurt every fiber of my being. After a quick call to my Gearhead soulmate, Shawn, he reminded me that I have mad skills and there was nothing that wasn’t custom in this car as it was. Why let a transmission pan stop me from customizing yet one more piece.
So another hour goes by cutting, grinding, fitting, re-grinding, and fitting once again and my wife pops in to see what all of the noise is. “Isn’t that the new part that we just ordered?” she yells over the grinder. I replied with, “yes, this is just part of the installation process, no worries.” Needless to say the spit tank now fits perfectly in front of the pan and shares the same holes as the final two bolts I had left over.


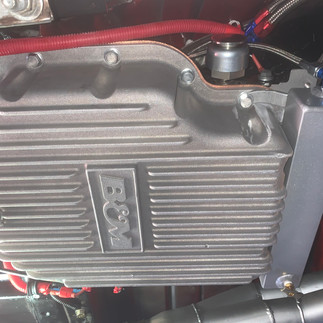
#1 - A brand new, deep aluminum finned pan that was clean and beautiful is about to be heavily molested. As they say no guts, no glory. What’s one more custom part on a custom car?
#2 - This is what my brand new pan looked like after cutting and grinding away all of those beautiful fins. It was rather easy explaining to my wife that this was how all pans needed to be installed. (Shhh)
#3 - It fought me the entire time, making every step far from easy. But at the end of the day, she was home at last looking good.


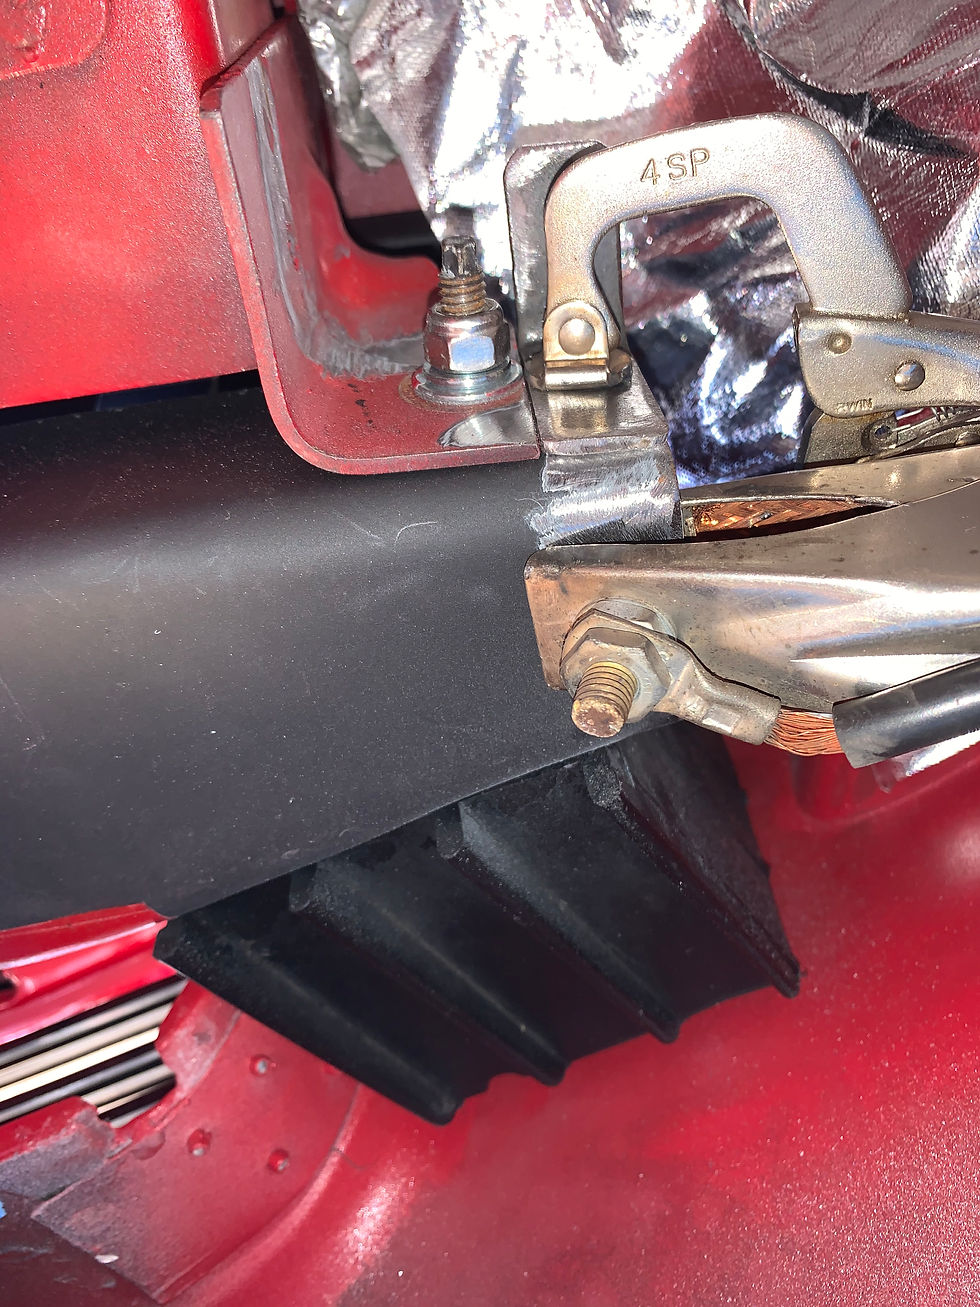
#1 - All transmission pans are not created equal. This overflow tank once fit perfectly next to my old pan. When I saw this, I knew it was going to be a long day.
#2 - So much for ordering a transmission pan with a temp sensor bung already in it. The placement of the pre drilled bung was directly in the way of the filter. I tried bending the thermocoupler every possible way, all to no avail. After some precise measuring, and a lot of staring, I found the ideal spot to drill and tap the new home for the sensor.
#3 - After all of that cutting and grinding, not to mention custom making new mounting arms, the overflow tank sits firmly against the transmission pan. I was happy to put a check mark after this on my to do list.
That leaves us with just more upgrade. How do I fit a massive 16 row trans cooler with a 650 cfm fan in the same spot as the old pan, and re-use the existing -6 braided cooler lines? Another long staring contest and a few cardboard templates later, I got the courage to cut some metal and begin to bend, drill, and weld it into the most perfectly painted area imaginable. I will spare you all of the details on that “pucker” experience, but it turned out perfect and NOTHING was harmed during the process.
Things were about to get real as I grinded once painted metal and prepared it for welding.


Somehow by the grace of God, I was able to fit this behemoth in the tiny space that I originally allotted for the old cooler. There was a very long staring session and a few different cardboard templates made trying to fabricate the perfect set of brackets for this. As a finishing touch, I made a carbon fiber air scoop to help bring air into the cooler. The things we go through trying to be cool.
I figured out a slick way to consolidate two very small circuits into one arming switch and free up a circuit for my new trans cooler fan. There really was no need to have individual master arming switches for my trans brake and line lock. After all they are both armed at the same time anyway and triggered individually from the steering wheel.
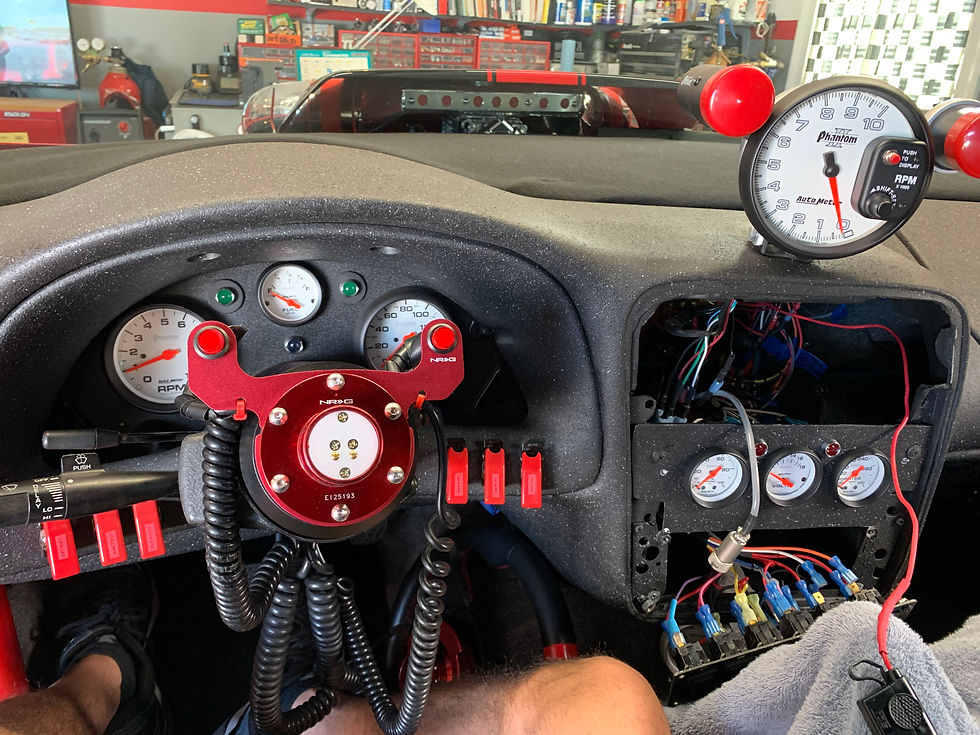
I figured out how to consolidate two circuits into one and make room for the trans cooler switch to make its home in my switch panel. I really didn't want to have another switch on my dash. It is already looking like an F-16 cockpit.
I have to admit it was a proud and happy moment adding fluid back into her and seeing everything working perfectly together with no leaks. It never ceases to amaze me the lengths that people go through just trying to be cool. Until next time Keep Wrenching, JT


Comments